About Qweas
 RSS Feeds
BBS Forum RSS Feeds
BBS Forum
|
Make Qweas.com My Home Page Bookmark this page | Register Login Help Send Feedback |
About Qweas
 RSS Feeds
BBS Forum RSS Feeds
BBS Forum
|
Make Qweas.com My Home Page Bookmark this page | Register Login Help Send Feedback |

|
| ||||||||||
| |||||||||||
| Audio/Video | Business | Communication | Desktop | Develop | Education | Games | Graphic | Home | Network | Security | Servers | System | Web |
Introduction | Download | Screenshot | More InfoliteCam Screenshots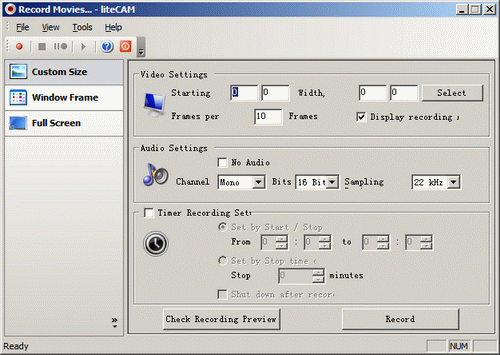 liteCam Main Window When you launch the liteCam from desktop or Programs group, you will see the above window which is the main window of liteCam. From the main window, users can select the recorded frame size from the left panel. Three sizes are Custom Size, Window Frame and Full Screen. When the size is properly set, you can click the button "Record" to launch the record. 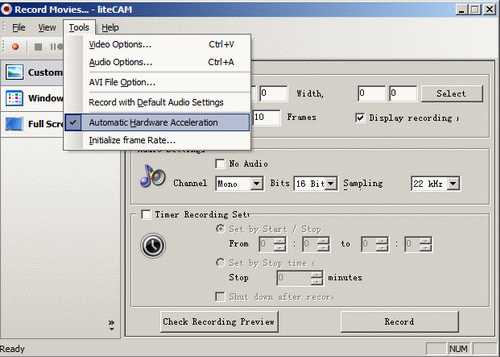 Automatic Hardware Acceleration If you are running liteCam for the first time, you will see the screen shown above. It is recommended to select the automatic hardware acceleration first, however you can change this setting at any time from: Tools > Automatic Hardware Acceleration. 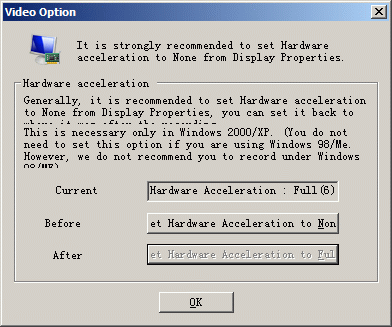 Video Option Dialog If you did not select the Automatic hardware acceleration option, you will have to set it manually. More importantly, when you're recording through a web browser or Windows Media Player, you must run the web browser or Windows Media Player after the video setting. These are the general steps for setting up. Run LiteCam > Setup video and audio >run movie player (web browser or any media player) >Record If you run any media player before you set up the video option, the screen may not record or play properly. In order to set up, Click the Tools menu > select Video Options. You will see the Video Options dialog box shown above. 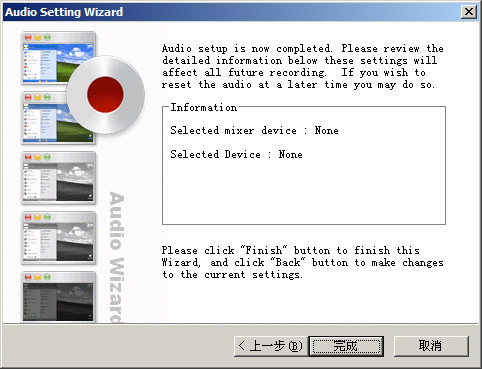 Audio Setting Wizard In order to set up audio options, Click the Tools menu > select Audio Options You will see the Audio Setting Wizard box shown above. Follow the wizard, if upon clicking Auto Detect button, liteCam will detect your sound card. You will hear a static sound for 5 -20 seconds. 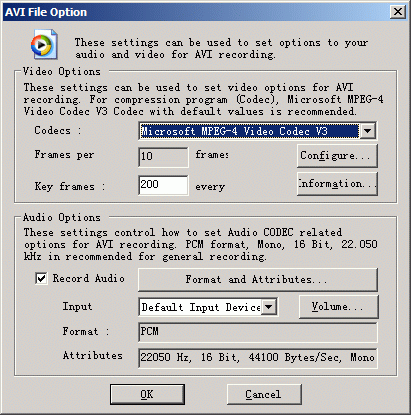 AVI File Option For all of the recording modes we have discussed, you will be prompted to save your file right after clicking the Record button. After saving your file, you will see this dialog box where you can set options for AVI files. As you can see from the dialog box below, you can choose which compression program (Codec) you want to use. Microsoft MPEG-4 Video Codec V3 Codec with default values is recommended for standard recording. If you have specific Codecs you would like to use, you can select from the drop down menu and configure it manually. When you are done, click the OK button to start recording. Your recording will begin immediately after you click the OK button. |
|
|
Old Category:
Video & DVD |
Video & DVD for Mac |
Audio & MP3 |
Makers & Designers |
Graphics Tools |
Internet Utilities |
Web Authoring |
System Tools |
File Converters
Home & Education | Screensavers | Security & Anti-Virus | Pocket Devices | Business Finance | Computer Games | Computer Games for Mac Site Map | Submit Software | Popular Downloads | Editor Picks | Get Buttons | Link to Us | New Releases | About Qweas | Contact Us Copyright © 2005-2009 Qweas Inc. All rights reserved. Terms of Service - Copyright Policy - Guidelines - Privacy Policy |